The Mail app allows you to send and receive email from personal and professional contacts. You can create Email Groups in the Mail app to send multiple emails to a group of contacts simultaneously. But when you’re on leave, you may not want to receive work-related emails.

You may miss notifying your contacts about your leave. The Mail app allows you to send an autoresponder as an Out of Office message. This post will show you how to set up Out of Office messages in the Mail app on your Mac.
Set up out of office messages in the mail app
Out of Office Notifications are an automatic reply to contacts who are trying to reach you when you are not available. You can set up out of office replies in Apple Mail to notify your contacts of your absence. There are two ways to do this in the Mail app on your Mac. However, we recommend that you install the latest version of the Mail app before following the steps to avoid problems.
Using the Rules feature
You can create rules in the Mail app on your Mac to effectively manage your email. You can use this function to create an auto-reply that looks like an Out of Office message. The steps are more numerical, but the method is pretty easy. Here’s how it happens.
Step 1: Press the keyboard shortcut Command + Spacebar to open Spotlight Search, type Letters, and press Back.

Step 2: Click Mail in the top left corner.

Step 3: Select Settings.

Step 4: Click the Rules tab in the General window.

Step 5: Click Add Rule on the right side.

You’ll see different options for adding your rule. We must create an account to set up out of office replies in Apple Mail on your Mac.
Step 6: Keep the ‘Any’ section default to ‘If the following conditions are met.’

Step 7: To get started with the initial condition, click the first drop-down menu.

Step 8: Select Account.

Step 9: Select the email account that will send out-of-office replies to your contacts.

Step 10: Under ‘Perform the following actions’, click the first drop-down menu.

Step 11: Select Reply to message.

Step 12: Click Reply to text message.

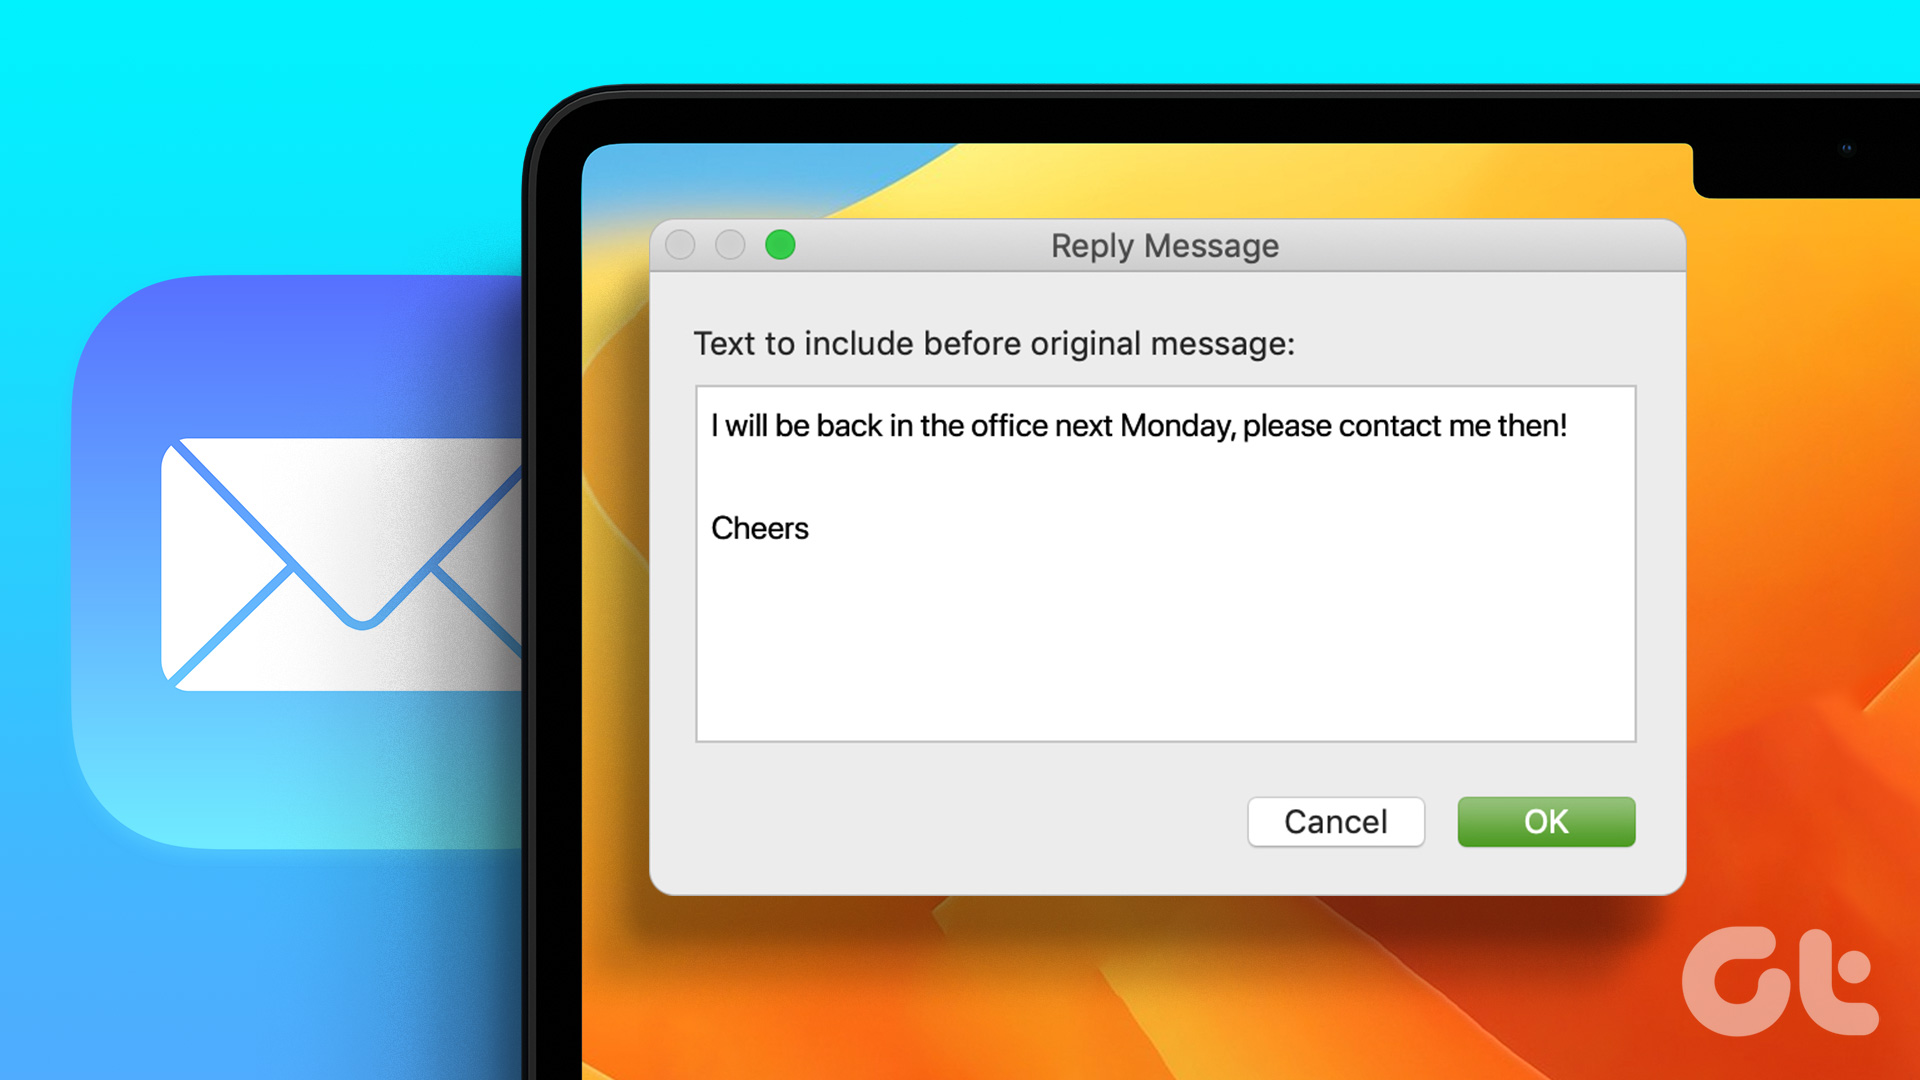
Step 13: Enter your Out of Office message to be sent and click Ok to confirm.

Step 14: Click Ok again to confirm.

Step 15: Select Not Apply. Make sure you don’t select Apply as it will send Out of Office messages to all your current emails in the inbox.

Here’s how you can create an Out of Office message in the Mail app on your MacBook or iMac. The rule will show up on your screen.
You also have the option to Edit or Remove the rule from your mailbox.

Use Inbox Settings
Alternatively, here’s how you can use the Mail app’s inbox settings to set up out-of-office messages on your Mac.
Step 1: Press the keyboard shortcut Command + Spacebar to open Spotlight Search, type Letters, and press Back.
Step 2: Right-click Inbox from the menu on the left.

Step 3: Select Get out of the office.

Step 4: Select the Out of Office tab in the Account Information window.

Step 5: Enable the ‘Send out of office reply’ option.

Step 6: Select Start Date and End Date and enter your message.
Step 7: Select Send Messages Until Disabled or When Scheduled from the drop-down menu.

To remove the Out of Office message, simply click the checkbox again to turn it off.

Enjoy your day off
You can set up office messaging in the Mail App on your Mac to avoid any communication delays and notify people of your absence from work. You can follow the same steps for any email client such as Gmail, Outlook, and Yahoo in the Mail app. You can also sign in with your Microsoft Exchange account in the Mail app on your Mac. But some users complain that they see blank message bodies in the Mail app. In case you are also facing the same issue, we have shared the best fixes for Apple Mail showing blank content for messages with Microsoft Exchange on Mac.
Categories: How to
Source: thpttranhungdao.edu.vn/en/