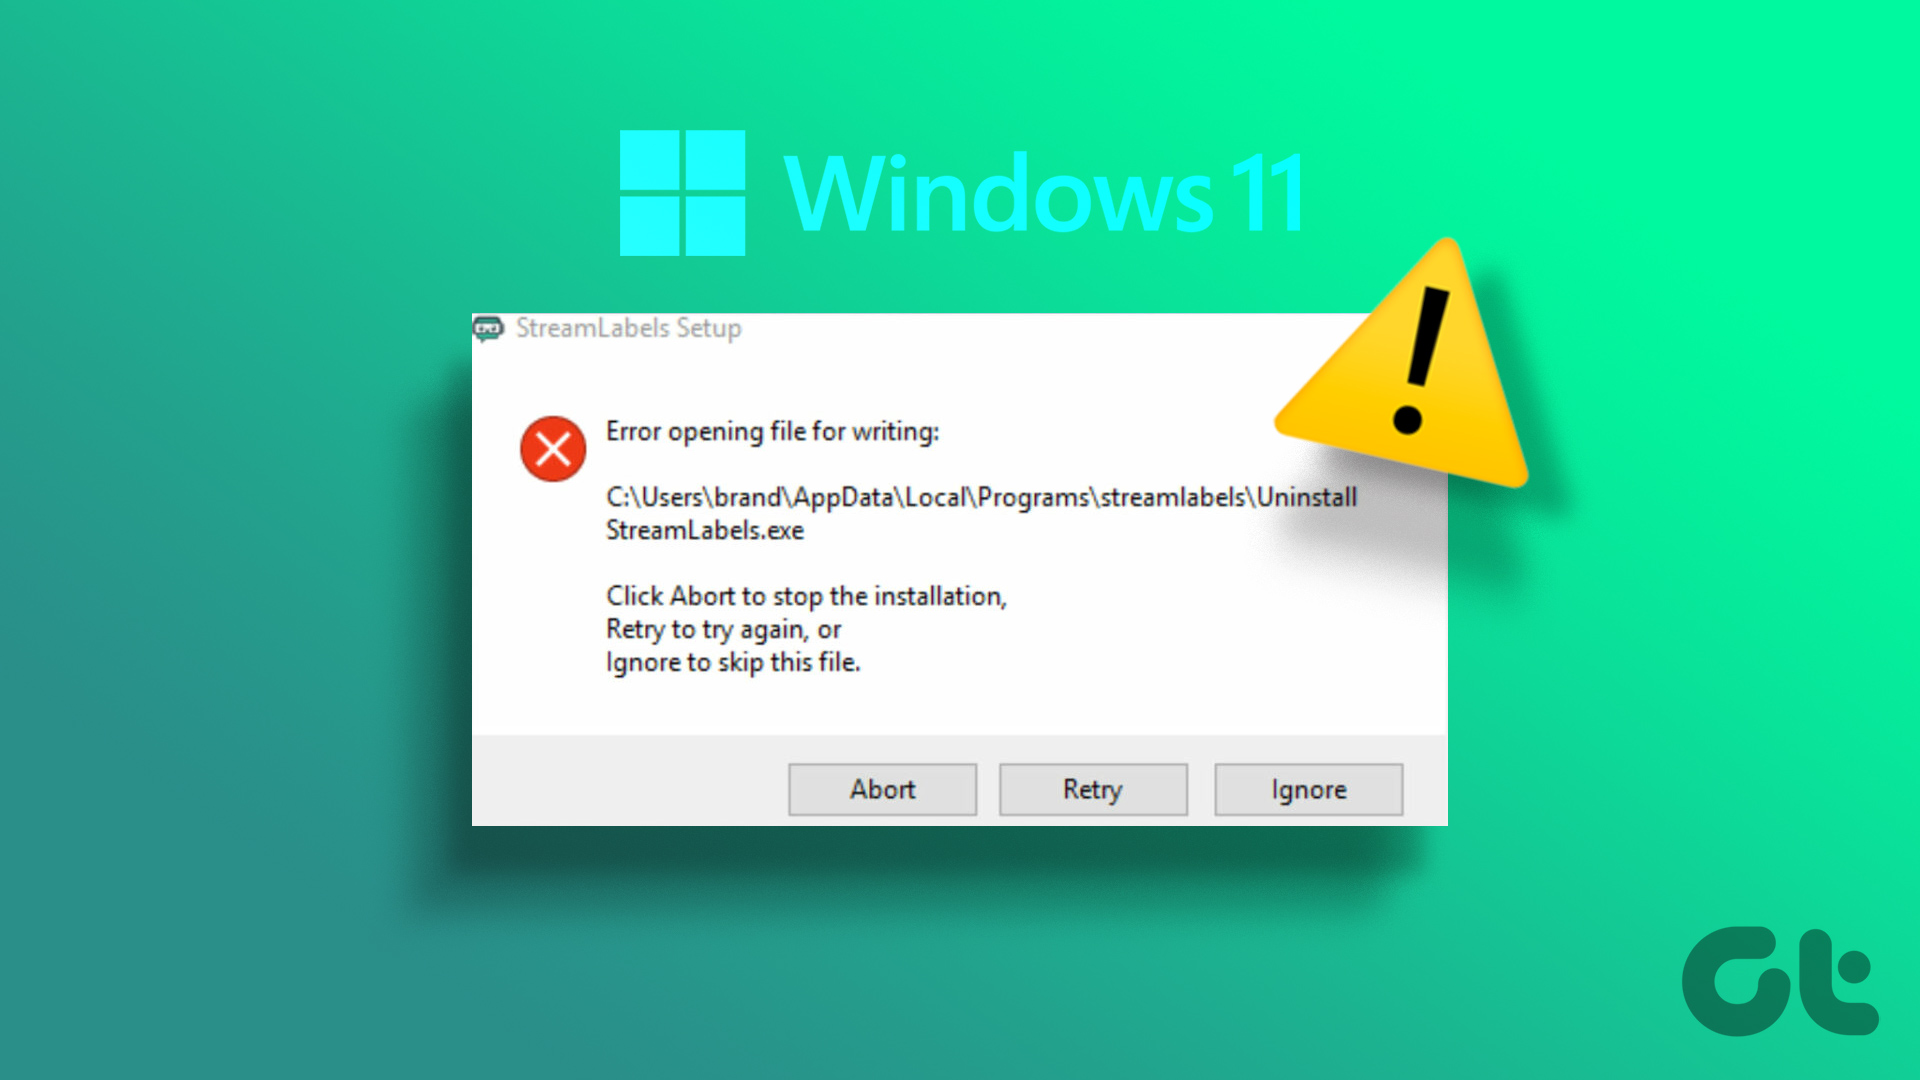
While the Microsoft Store is the go-to option for installing the most popular apps, it doesn’t carry every app or software with it. There will be a lot of apps that you will have to download from the internet. While that’s not a problem, Windows 11 can sometimes give an “Error opening file for writing” error when trying to install apps.

That error can frustrate you, especially since you haven’t made any system-level changes in Windows. Fortunately, you can easily solve this problem. We have compiled the best ways to fix the “Error opening file for writing” error in Windows 11.
- 1 What does ‘Error opening file for writing’ mean
- 2 1. Re-download the file
- 3 2. Run the installer with administrative rights
- 4 3. Choose a different installation directory
- 5 4. Change folder permissions
- 6 5. Use the Program Compatibility Troubleshooter
- 7 6. Temporarily Disable Control Folder Access
- 8 7. Switch to a New User Account
- 9 Install your favorite apps on Windows 11
What does ‘Error opening file for writing’ mean
Before you proceed with the solutions, you should know what the error means, which can help you to fix the problem well on your Windows computer. The error appears when Windows cannot write an important file needed to install the application. The problem usually occurs when installing popular apps like Steam, VLC media player and MSI Afterburn. So when you can’t install the application, the error is thrown out of course. But you can solve this problem by following these solutions.
1. Re-download the file
Usually you will have this problem when installing if the browser does not download the complete installation file. What we mean is that the file size of the setup file is smaller than the actual size displayed at the time of download. To make sure that’s not causing the problem, download the software again.
Also, make sure that you are downloading the correct version of the software if it is available in 32-bit and 64-bit. If you run Windows 11, you’ll most likely need the 64-bit version. But for Windows 10, you may want to check the version on your computer.
So re-download the program and install it to check if the problem persists. If so, try the next solution on the list.
2. Run the installer with administrative rights
We recommend that you run the installer with administrative privileges. That ensures the installer has write permission to the various files needed to install the software.
You can run the installer with administrative rights by right-clicking on it and selecting Run as administrator from the context menu. Then go through the installation wizard and check if the error reappears.

3. Choose a different installation directory
Windows will choose the system drive (usually Drive C) as the installation location of all applications. However, if there are any problems with that drive, you will likely see an error.
So, when the installer asks you to choose an installation location, choose a different drive using the Browse option. Then continue with the installation and check for the problem.

4. Change folder permissions
If switching the installation directory doesn’t make any difference, your account may not have write permission to the directory where you want to install the software. To fix this, you will need to customize the security permissions of that folder. Here’s how to do it:
Step 1: Right-click on the folder you want to install the program and select Properties.

Step 2: Switch to the Security tab.
Step 3: Click the Edit button.

Step 4: Click Add.

Step 5: Select the Advanced option.

Step 6: Click the Find Now option.

Step 7: Select People from the search results and click OK.

Step 8: Select the Full Control check box and click Apply, then OK.

5. Use the Program Compatibility Troubleshooter
The ‘Error opening file for writing’ error may appear if the associated program is not compatible with your version of Windows. To work around this situation, you can use the Program Compatibility Troubleshooter.
It’s a built-in Windows utility that solves any compatibility issues an application may have. You can use the Program Compatibility Troubleshooter by following these steps:
Step 1: Right-click on the installer and select Properties from the context menu.

Step 2: Click the Compatibility tab at the top.
Step 3: Click the ‘Run compatibility troubleshooter’ button.

Follow the on-screen instructions in the Get Help window to complete the troubleshooting process.
6. Temporarily Disable Control Folder Access
Controlled folder access is an important Windows feature that ensures no third-party applications can make unauthorized changes to protected folders and memory areas. However, if you trust the app, you can disable this feature to allow the app to make changes.
To disable controlled folder access, follow the instructions below:
Step 1: Press the Window key to open the Start Menu, type Windows Security and press Enter.

Step 2: Click ‘Virus and threat protection’ on the left sidebar.

Step 3: Click Manage Settings.

Step 4: Click ‘Manage controlled folder access’.

Step 5: Turn off the switch under Controlled Folder Access.

Try to install the program and check if you get another error again. If so, re-enable the Controlled folder permissions toggle.
7. Switch to a New User Account
If you’re still getting the same error message, there might be a problem with your user account. You can switch to a new user account. To do that, follow these steps:
Step 1: Press the Windows + I keyboard shortcut to open the Settings app and select Accounts from the left sidebar.

Step 2: Select Other Users from the right pane.

Step 3: Click the Add Account button.

Step 4: Click the ‘I don’t have this person’s credentials’ option.

Step 5: Select the ‘Add a user without a Microsoft account’ option.

Step 6: Enter the details asked and click Next.

You have created a user account. To switch to it, press the Windows key and click your profile icon in the bottom left corner of the Start Menu. Then, select another account from the list.

Install your favorite apps on Windows 11
No one likes to face interruptions during the installation process. The ‘Error opening file for writing’ error is one of many installation errors that prevent you from installing programs. Fortunately, you can quickly fix the error using the fixes above.
Categories: How to
Source: thpttranhungdao.edu.vn/en/